
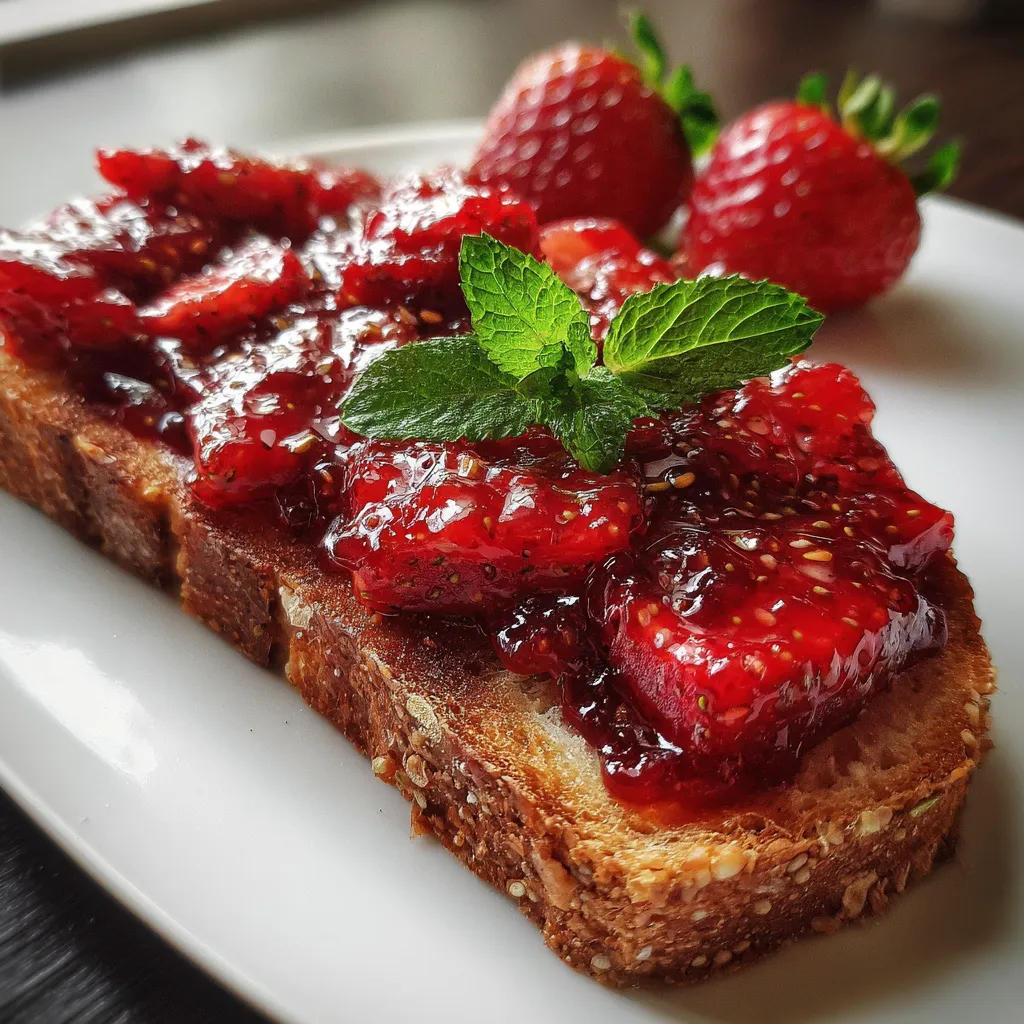
Fresh strawberries and sugar mingle in a bubbling, fragrant pot, slowly transforming into a glossy, ruby-red spread that tastes like summer sunshine. Watching those vibrant berries soften and release their juice is pure kitchen magic, as the mixture thickens to a shiny, spreadable consistency ready for toast, scones, or spooning straight into your mouth. This Homemade Strawberry Jam captures the essence of sunny days and simple joy—grab your jars and let’s dive into a recipe that’s as fun and fresh as the berries themselves!
Key Ingredients
To bring this Homemade Strawberry Jam to life, you only need four pantry staples that work together to create that perfect balance of sweetness, texture, and preservation:
- 500 g fresh strawberries: Brimming with sweet, juicy flavor and natural pectin to help the jam set perfectly.
- 400 g granulated sugar: Sweetens the jam while drawing out strawberry juices and acting as a natural preservative.
- 1 tbsp fresh lemon juice: Adds bright acidity to balance sweetness and boosts pectin activation for a firmer set.
- 1 tsp unsalted butter: Reduces surface foam during cooking, ensuring a smooth, clear jam without altering flavor.
How To Make Homemade Strawberry Jam
Creating this jam is a simple, hands-on process that rewards you with jars of bright, flavorful spread. You’ll start by prepping fresh berries, then gently simmer them with sugar and lemon juice to build depth of flavor and the right consistency. Occasional stirring and skimming foam ensures clarity, while a quick plate test guarantees the perfect set. Once your jam reaches that luscious texture, finish with a touch of butter and jar it up for long-lasting deliciousness. Let’s break down each step:
1. Wash the strawberries under cold running water and remove the green tops. Rinse each berry thoroughly to remove any debris, then use a paring knife to trim off the leafy caps without wasting fruit.
2. Hull and quarter the strawberries, then place them in a heavy-bottomed saucepan. Cutting into quarters helps the berries cook down evenly and release their juices more efficiently.
3. Sprinkle the sugar over the strawberries and let them sit for 30 minutes to macerate. This resting period draws out natural juices, creating a sweet syrup that intensifies the jam’s flavor.
4. Add the lemon juice and heat the mixture over medium heat, stirring until the sugar dissolves. The acidity from the lemon keeps the color bright and aids pectin in setting the jam.
5. Bring to a gentle boil, then reduce the heat and simmer for 15 to 20 minutes, stirring occasionally. Keep an eye on the texture—it should thicken and coat the back of your spoon.
6. Skim any foam from the surface with a spoon to achieve a clear jam. Removing foam ensures a smoother appearance and texture in your finished jars.
7. To test for set, place a small drop on a cold plate; if it wrinkles when pushed, the jam is ready. Use the cold plate method to avoid overcooking and maintain fruit flavor.
8. Stir in the butter to minimize foaming and remove the pan from heat. The butter breaks down remaining air bubbles for a glossy, uniform finish.
9. Carefully ladle the hot jam into sterilized jars, seal immediately, and let cool to room temperature. Proper sealing locks in freshness and flavor for months to come.
Serving Suggestions
Your Homemade Strawberry Jam is ready for its moment in the spotlight, and there are countless delicious ways to serve it. For a bright breakfast, spread it generously on toasted sourdough or swirl it into creamy Greek yogurt for a sweet, tangy contrast. At brunch, dollop on warm pancakes or crepes to elevate each bite with vibrant color and fruity sweetness. Looking for a sophisticated touch? Pair the jam with a cheese board featuring soft brie or tangy goat cheese, where its glossy ruby hue will shine against savory flavors. No matter how you serve it, each suggestion promises a burst of summer in every bite.
- Spread a thick layer on warm toast or bagels for an effortless morning treat.
- Stir into a bowl of vanilla ice cream for a quick, fruity dessert.
- Use as a filling in crepes or between cake layers to add moisture and color.
- Pair with a selection of artisanal cheeses and crackers for a charming appetizer.
Tips For Perfect Homemade Strawberry Jam
Every batch of jam has its quirks, and these friendly pointers will help you nail the perfect texture and flavor every time. From ensuring crystal-clear jars to preventing unwanted foam, these tips are the result of a few sticky-starred experiments in my own kitchen—so you can skip the hiccups and get straight to that glossy, ruby-red goodness.
- Ensure jars and lids are properly sterilized to prevent contamination.
- Skimming foam results in a clearer jam with a smoother texture.
- Store unopened jars in a cool, dark place for up to 1 year.
- Once opened, keep refrigerated and use within 3 weeks.
How To Store It
Proper storage makes all the difference when it comes to preserving that fresh, summery flavor of your jam. Whether you’re shelving jars for months or enjoying a just-opened jar at the breakfast table, following these tips will keep your Homemade Strawberry Jam tasting its best:
- Unopened jars: Store in a cool, dark place (pantry or cupboard) for up to 1 year to maintain flavor and freshness.
- Opened jars: Keep refrigerated with the lid tightly sealed and use within 3 weeks to prevent spoilage and preserve texture.
Frequently Asked Questions
Here are answers to some common questions that pop up when making homemade jam:
- How do I properly sterilize jars and lids before filling them with jam?
A: To sterilize jars and lids, wash them in hot, soapy water and rinse well. Place jars upright on a baking tray in an oven preheated to 120 °C (250 °F) for 10–15 minutes. Immerse lids in simmering (not boiling) water for 5 minutes. Keep jars hot until you’re ready to ladle in the jam to prevent cracking and bacterial contamination.
- Why is a heavy-bottomed saucepan recommended for making this strawberry jam?
A: A heavy-bottomed saucepan distributes heat evenly and prevents hot spots that can scorch the sugar-fruit mixture. This even heating helps the sugar dissolve uniformly, reduces sticking, and ensures a smooth jam texture without burnt flavors.
- What is the purpose of adding unsalted butter to the jam at the end of cooking?
A: The tablespoon of unsalted butter helps reduce surface foam by breaking down air bubbles as the jam cools. Adding it off the heat minimizes foaming during storage and gives the jam a clearer, smoother consistency without altering its flavor.
- How can I tell when the jam has reached the proper set?
A: To test for set, chill a small plate in the freezer. When you think the jam is ready (after about 15–20 minutes of simmering), spoon a drop onto the cold plate. Let it sit for 1 minute, then push gently with your finger. If the surface wrinkles rather than running back together, the jam has reached its set.
- Can I use frozen strawberries instead of fresh ones, and will it affect the recipe?
A: You can use frozen strawberries, but thaw them completely and drain any excess liquid before measuring 500 g. Macerate them with sugar as instructed to draw out moisture, then proceed with the same cooking times. Be prepared for a slightly longer boil to achieve the proper set due to additional water released by the thawed berries.
- What is the recommended storage method and shelf life for homemade strawberry jam?
A: Store unopened, properly sealed jars in a cool, dark place (pantry or cupboard) for up to one year. Once opened, keep the jar refrigerated, ensure the lid is tightly sealed, and use the jam within three weeks to maintain optimal freshness and prevent spoilage.
What Makes This Special
This Homemade Strawberry Jam shines because it captures pure summer bliss in every spoonful—no artificial pectins or additives required. The simple trio of fresh berries, sugar, and lemon juice lets the natural fruit flavor steal the show, while the finishing touch of butter ensures a glassy, lump-free spread. Whether you’re slathering it on morning toast, spooning it over ice cream, or gifting jars to friends, it’s the kind of recipe that sticks in your memory (and your kitchen!). Feel free to print and save this guide for your next berry harvest, and drop a comment below with your thoughts or questions—I’m here to help!
Print
Homemade Strawberry Jam
- Prep Time: 10 mins
- Cook Time: 20 mins
- Total Time: 30 minutes
- Yield: 12 servings
- Category: Appetizers
Description
Fresh berries and sugar mingle into a bubbling, fragrant pot of jam, their sweet aroma filling the kitchen as the mixture thickens to a shiny, spreadable consistency.
Ingredients
- 500 g fresh strawberries
- 400 g granulated sugar
- 1 tbsp fresh lemon juice
- 1 tsp unsalted butter
Instructions
- Wash the strawberries under cold running water and remove the green tops.
- Hull and quarter the strawberries, then place them in a heavy-bottomed saucepan.
- Sprinkle the sugar over the strawberries and let them sit for 30 minutes to macerate.
- Add the lemon juice and heat the mixture over medium heat, stirring until the sugar dissolves.
- Bring to a gentle boil, then reduce the heat and simmer for 15 to 20 minutes, stirring occasionally.
- Skim any foam from the surface with a spoon to achieve a clear jam.
- To test for set, place a small drop on a cold plate; if it wrinkles when pushed, the jam is ready.
- Stir in the butter to minimize foaming and remove the pan from heat.
- Carefully ladle the hot jam into sterilized jars, seal immediately, and let cool to room temperature.
Notes
- Ensure jars and lids are properly sterilized to prevent contamination.
- Skimming foam results in a clearer jam with a smoother texture.
- Store unopened jars in a cool, dark place for up to 1 year.
- Once opened, keep refrigerated and use within 3 weeks.