
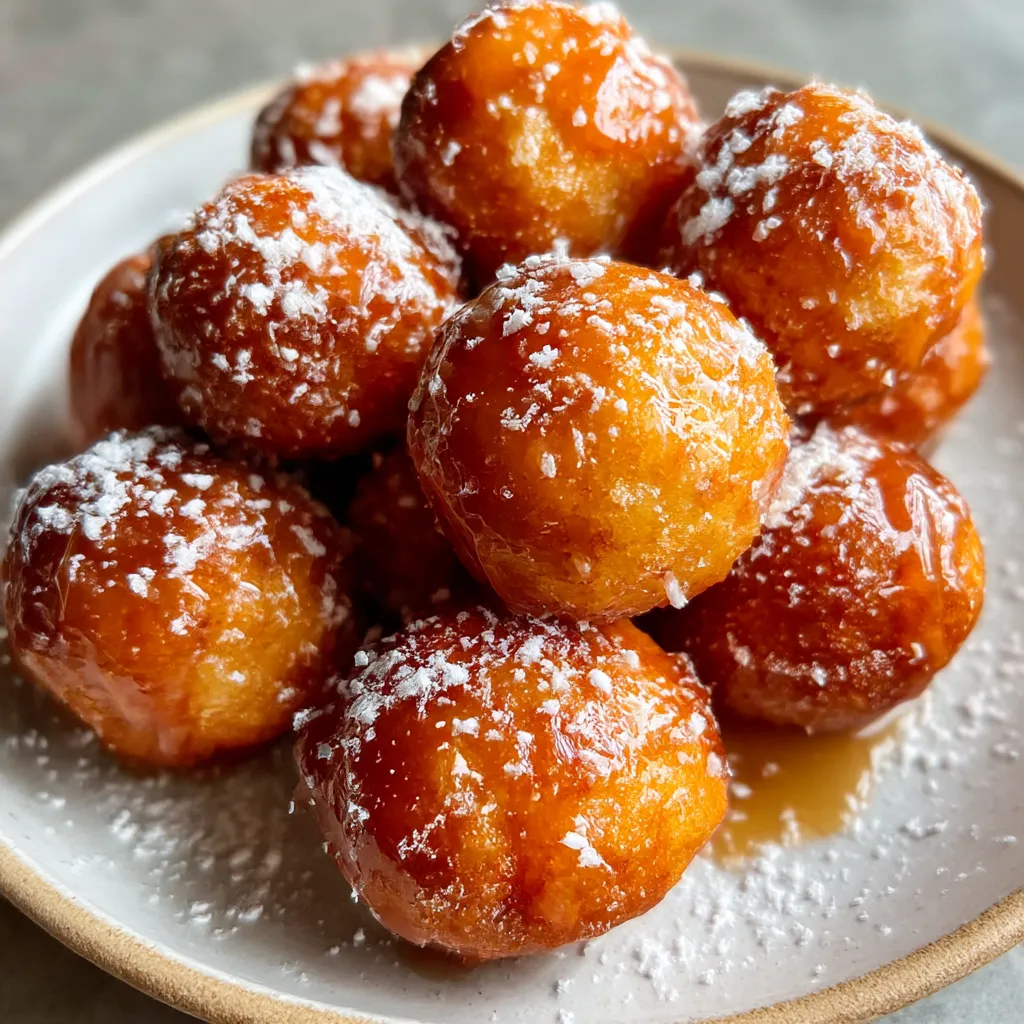
Glazed Donut Holes are bite-sized golden dough balls coated in a silky vanilla glaze—crispy on the outside, tender inside. These golden puffed rounds crackle with a crisp shell and give way to pillowy centers, all dressed in a glossy vanilla glaze that melts on your tongue. A hint of nutmeg and vanilla fills the kitchen as you dip each warm bite. Perfect for brunch or an afternoon treat, this beginner-friendly recipe brings sweet satisfaction without fuss, so grab your whisk and fryer and prepare to fall in love one donut hole at a time.
Key Ingredients
Gathering the right ingredients is half the fun when making Glazed Donut Holes. Each component plays a simple but important role in creating those crisp exteriors, tender centers, and that glossy vanilla finish.
- 2 cups all-purpose flour: Provides structure and stability for tender, well-shaped dough balls.
- 1/4 cup granulated sugar: Adds sweetness and helps the exterior caramelize to a light golden hue.
- 2 teaspoons baking powder: Leavening agent that puffs up the dough into airy, bite-sized rounds.
- 1/2 teaspoon salt: Balances the sweetness and enhances the overall flavor of the donut holes.
- 1/4 teaspoon ground nutmeg: Delivers a warm, aromatic note that complements the vanilla glaze.
- 1 large egg: Binds the ingredients and contributes moisture for a cohesive dough.
- 2/3 cup milk: Hydrates the flour and creates a smooth batter that fries to a tender crumb.
- 2 tablespoons unsalted butter, melted: Adds richness and helps the dough brown beautifully.
- 2 quarts oil for frying: Neutral, high-smoke-point oil ensures even frying and a crisp exterior.
- 1 1/2 cups powdered sugar: Forms the base of the glaze, offering sweetness and a silky finish.
- 3 tablespoons milk: Thins the powdered sugar into a pourable glaze that clings to warm donut holes.
- 1/2 teaspoon vanilla extract: Infuses the glaze with classic vanilla flavor for a glossy, aromatic coating.
How To Make Glazed Donut Holes
Turning simple pantry staples into perfect glazed donut holes only takes a few steps—and you’ll love how approachable each one is. You’ll mix a quick batter, fry until golden brown, then dunk each orb into a smooth vanilla glaze that sets into a delicate shell. Precision with temperature and gentle handling of the dough are key to achieving those pillowy centers and snap-crisp exteriors. Follow the detailed instructions below for consistent, mouthwatering results every time.
1. In a large bowl, whisk together the all-purpose flour, granulated sugar, baking powder, salt, and ground nutmeg to ensure the leavening agents and spices are evenly distributed.
2. In a separate bowl, beat the egg, milk, and melted butter with a fork or whisk until just combined and smooth, being careful not to overmix.
3. Pour the wet ingredients into the dry mixture and stir gently with a spatula or spoon until just moistened; small lumps are fine and will keep the donut holes tender.
4. Heat oil in a deep pot or fryer to 350°F, using a candy thermometer to maintain a steady temperature and ensure there’s enough oil to fully submerge the dough.
5. Use a small cookie scoop or two teaspoons to drop tablespoon-sized portions of dough into the hot oil, spacing them apart so they have room to expand.
6. Fry the donut holes in batches, turning occasionally with a slotted spoon until they are evenly golden brown, about 2 to 3 minutes per batch.
7. Remove the donut holes with the slotted spoon and drain them on paper towels to remove excess oil before glazing.
8. While the donut holes cool slightly, whisk together the powdered sugar, milk, and vanilla extract in a shallow bowl until the glaze is smooth and lump-free.
9. Dip each warm donut hole into the glaze, then place on a wire rack to allow the excess to drip off and the glaze to set into a thin, sweet shell.
Serving Suggestions
When it comes to serving Glazed Donut Holes, a few thoughtful touches can elevate these sweet bites from simple indulgences to memorable treats. Whether you're hosting friends, surprising family, or enjoying a solo snack moment, pairing and presentation make all the difference. Here are some ideas to showcase your golden dough balls in style—each suggestion highlights the crisp exterior, pillowy interior, and delicate vanilla glaze, ensuring your guests savor every mouthful. From cozy drink pairings to festive garnishes, these suggestions will help you plate like a pro and impress guests of all ages. Perfect for brunch buffets or after-dinner gatherings.
- Coffee pairing: Serve the donut holes alongside a freshly brewed espresso to balance the sweetness and accentuate the vanilla notes.
- Tea time: Offer them with a pot of bold black tea or green tea for a delicate contrast that complements the glaze.
- Fruit platter: Add a handful of mixed berries on the side for a burst of freshness and color against the golden bites.
- Ice cream companion: Plate a scoop of vanilla or strawberry ice cream next to warm donut holes for a decadent, indulgent twist.
Tips For Perfect Glazed Donut Holes
When it comes to frying and glazing donut holes, small adjustments go a long way toward achieving that perfect finish. Maintaining the ideal oil temperature prevents soggy centers and ensures a golden exterior. Gentle handling of the batter and timely dipping in the glaze result in tender, perfectly coated bites that everyone will devour. Read these friendly tips before you start so you’ll breeze through the process, avoid common missteps, and delight your friends and family with each pillowy glazed morsel.
- Keep the oil temperature steady to ensure even frying and avoid greasy donut holes.
- Avoid overmixing the dough to maintain a light, tender texture that puffs up beautifully.
- Dip the donut holes while still warm so the glaze firms up quickly into a thin, sweet shell.
- Store any leftovers in an airtight container at room temperature for up to two days to retain freshness.
How To Store It
Proper storage will help your Glazed Donut Holes stay fresh, tender, and irresistibly sweet for as long as possible. Since the glaze sets into a delicate shell, you’ll want to avoid environments that encourage moisture or cause the coating to weep. Follow these simple methods to keep your donut holes tasting just-fried, whether you’re saving a few for the next morning or prepping ahead for a gathering.
- Airtight container: Once completely cooled and the glaze is set, place donut holes in a single layer inside an airtight container to prevent them from absorbing odors or becoming soggy.
- Layer with parchment: If stacking donut holes, separate layers with parchment paper to avoid sticking and preserve the glaze finish.
- Room temperature: Store at room temperature away from direct sunlight, avoiding the refrigerator to prevent the glaze from weeping and the dough from drying out.
- Rewarm before serving: For a fresh-fried taste, gently reheat donut holes in a 300°F oven for 3–4 minutes or zap in the microwave for 5–7 seconds.
Frequently Asked Questions
Here are answers to common questions about making and enjoying these delightful Glazed Donut Holes.
- How long does it take to prepare and cook these glazed donut holes?
It takes about 10 minutes to mix and scoop the batter, 10 to 15 minutes to fry the donut holes in batches, and a few minutes to cool and glaze, for a total of roughly 25 to 30 minutes.
- What type of oil should I use for frying, and how do I keep the temperature steady at 350°F?
Use a neutral, high-smoke-point oil such as canola, vegetable, or peanut oil and heat it to 350°F using a candy thermometer. Watch the thermometer closely and adjust the heat so the temperature stays consistent—if it drops too low the donut holes will absorb excess oil, and if it rises too high they may brown too quickly on the outside while remaining undercooked inside.
- Why is it important not to overmix the dough, and how can I tell when it’s properly combined?
Overmixing develops gluten, resulting in dense, tough donut holes. Stir the wet and dry ingredients just until no streaks of flour remain—small lumps are fine, as the batter will relax and produce a tender, light texture when fried.
- How do I achieve the perfect glaze consistency and can I adjust its sweetness?
Whisk together 1½ cups powdered sugar, 3 tablespoons milk, and ½ teaspoon vanilla extract until very smooth. For a thinner glaze add up to 1 teaspoon more milk; for a thicker glaze add a little more powdered sugar. Adjust the ratio gradually until it coats the back of a spoon.
- Why should I let the donut holes cool slightly before dipping them in the glaze?
Allowing them to cool for a minute or two prevents the glaze from melting off entirely while still warm enough for the glaze to adhere and set into a thin, sweet shell.
- How can I test oil temperature if I don’t have a thermometer?
Drop a small pea-sized bit of dough into the oil—if it sizzles immediately and rises to the surface within a few seconds, the oil is around 350°F. If it browns too quickly, lower the heat; if it sinks without bubbling, increase the heat slightly.
- What’s the best way to store leftover glazed donut holes?
Once completely cooled and the glaze has set, place any leftovers in an airtight container at room temperature. They’ll stay fresh for up to two days—avoid refrigeration, which can cause the glaze to weep and the donut holes to lose tenderness.
What Makes This Special
These Glazed Donut Holes stand out because they turn simple pantry staples into irresistibly tender, sweet bites that disappear in seconds. The combination of nutmeg in the batter and silky vanilla glaze creates a nostalgic flavor that will transport you back to childhood fairs—without the long lines. Even beginners can master frying with these clear steps, and the quick set glaze gives each morsel a professional finish. Go ahead and print this article to keep the recipe close by, then let me know how your donut holes turned out! Feel free to share comments, questions, or any tweaks you tried—I’m always here to chat about all things sweet and fried.
Print
Glazed Donut Holes
- Prep Time: 15 mins
- Cook Time: 10 mins
- Total Time: 25 minutes
- Yield: 4 servings
- Category: Desserts
Description
These golden puffed rounds crackle with a crisp shell and give way to pillowy centers, all dressed in a glossy vanilla glaze that melts on your tongue. The aroma of nutmeg and vanilla fills the kitchen as you dip each warm bite.
Ingredients
- 2 cups all-purpose flour
- 1/4 cup granulated sugar
- 2 teaspoons baking powder
- 1/2 teaspoon salt
- 1/4 teaspoon ground nutmeg
- 1 large egg
- 2/3 cup milk
- 2 tablespoons unsalted butter melted
- 2 quarts oil for frying
- 1 1/2 cups powdered sugar
- 3 tablespoons milk
- 1/2 teaspoon vanilla extract
Instructions
- In a large bowl whisk together all-purpose flour granulated sugar baking powder salt and ground nutmeg.
- In a separate bowl beat the egg milk and melted butter until just combined.
- Pour the wet ingredients into the dry ingredients and stir until just moistened do not overmix.
- Heat oil in a deep pot or fryer to 350°F ensuring enough oil to fully submerge the dough.
- Use a small cookie scoop or two teaspoons to drop tablespoon-sized portions of dough into the hot oil.
- Fry the donut holes in batches turning occasionally until golden brown about 2 to 3 minutes per batch.
- Remove the donut holes with a slotted spoon and drain on paper towels.
- While the donut holes cool slightly whisk together powdered sugar milk and vanilla extract until smooth.
- Dip each warm donut hole into the glaze then place on a wire rack to allow excess to drip off.
Notes
- Keep the oil temperature steady to ensure even frying and avoid greasy donut holes.
- Avoid overmixing the dough to maintain a light tender texture.
- Glaze will firm up quickly on the warm donut holes creating a thin sweet shell.
- Store any leftovers in an airtight container at room temperature for up to two days.