
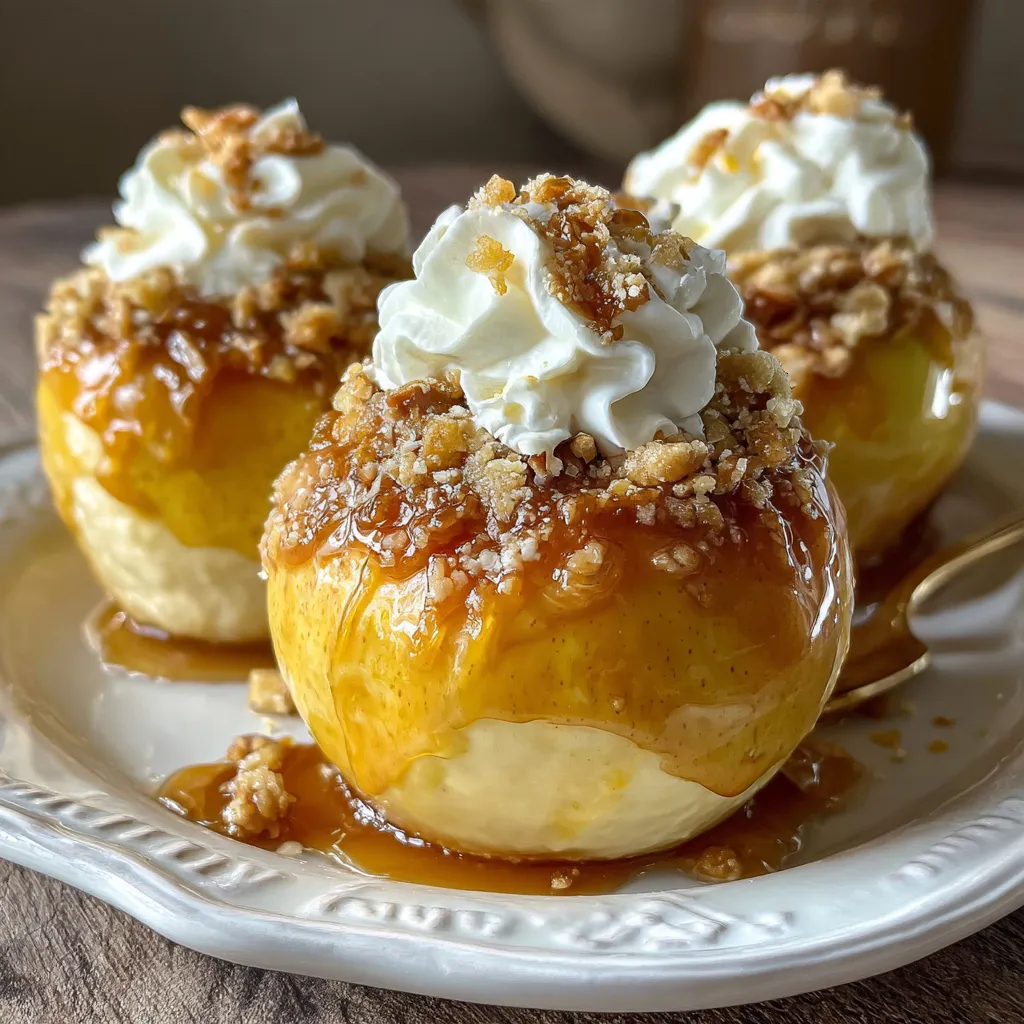
Cheesecake Stuffed Baked Apples bring together juicy baked apples brimming with creamy cheesecake filling, kissed by cinnamon and golden oats for a cozy fall dessert that’s sure to impress. Tender apple shells cradle a smooth, tangy cheesecake center, mingling warm spice and a hint of lemon zest in every bite. Whether you’re serving these at a family gathering or enjoying a quiet night in, this beginner-friendly treat will have everyone asking for seconds—and maybe a third!
Key Ingredients
Before you get started, make sure you have these simple ingredients on hand. Each one plays a vital role in creating the perfect balance of sweet, tangy, and cozy flavors.
- 4 medium apples: Crisp fruit shells that soften in the oven and hold the rich cheesecake filling.
- 8 ounces cream cheese, softened: Creamy, tangy base that transforms into a smooth cheesecake center.
- 1/4 cup granulated sugar: Adds sweetness and helps the filling set up nicely.
- 1 large egg: Binds ingredients together, giving the filling structure and a slight puff.
- 1 teaspoon vanilla extract: Delivers warm, aromatic depth to the cheesecake mixture.
- 1 teaspoon lemon zest: Brightens the flavor with a fresh citrus note.
- 1/2 teaspoon ground cinnamon: Infuses the filling and oats with warm, comforting spice.
- 2 tablespoons brown sugar: Brings caramel-like richness to the oatmeal topping.
- 2 tablespoons rolled oats: Creates a golden, slightly crunchy crumble on top.
- 1 tablespoon unsalted butter, melted: Helps the brown sugar and oats bind for a perfectly crisp topping.
How To Make Cheesecake Stuffed Baked Apples
With your ingredients prepped and your oven warming up, let’s dive into the step-by-step process that turns humble apples into an irresistible, dessert-worthy delight. You’ll learn to carefully hollow the apples, whip up a lusciously smooth cheesecake filling, and bake everything to tender, gooey perfection. Follow these detailed instructions to ensure each apple is filled evenly and bakes through without bursting or undercooking.
1. Preheat the oven to 350°F (175°C) and lightly grease a baking dish with butter or nonstick spray, ensuring the apples won’t stick.
2. Slice the top off each apple about 1/2 inch below the stem. Use a corer or spoon to gently remove the core and seeds, creating a smooth cavity while leaving the bottom intact.
3. In a mixing bowl, whisk together cream cheese, granulated sugar, egg, vanilla extract, lemon zest, and cinnamon until completely smooth and fluffy, scraping down the sides as needed.
4. Stir in brown sugar, rolled oats, and melted butter to the cheesecake mixture, folding with a spatula until the ingredients are evenly distributed.
5. Spoon the cheesecake filling into each apple cavity, mounding it slightly above the rim for a gooey peak once baked.
6. Place the stuffed apples snugly in the prepared baking dish. Bake for 25–30 minutes, or until the apples are tender when pierced with a fork and the cheesecake filling is set around the edges.
7. Remove from the oven and let the apples cool slightly (about 5 minutes) before serving to allow the filling to firm up and prevent burns.
Serving Suggestions
These Cheesecake Stuffed Baked Apples are delicious on their own, but a few thoughtful accompaniments can elevate the experience and turn your kitchen into a cozy café.
- Serve with a scoop of vanilla ice cream on the side for a classic hot-and-cold contrast that melts into the warm filling.
- Drizzle with warm caramel sauce just before serving to enhance the fall flavors and add a glossy finish.
- Garnish each apple with a sprinkle of chopped nuts (pecans or walnuts) to introduce an extra layer of texture and nuttiness.
- Offer a dollop of whipped cream and a light dusting of cinnamon on top for an elegant touch and extra creaminess.
Tips For Perfect Cheesecake Stuffed Baked Apples
Getting these apples just right is all about balancing texture and flavor. A handful of simple tweaks will ensure your dessert shines, whether you’re a beginner or a seasoned home baker.
- For extra crunch stir chopped pecans or walnuts into the filling.
- Leftover baked apples can be stored in an airtight container in the refrigerator for up to two days.
- Drizzle with caramel sauce or honey for added sweetness before serving.
- Use gluten-free oats to make this recipe suitable for gluten-free diets.
How To Store It
If you happen to have any leftover apples (we won’t judge!), storing them correctly will keep them tasting fresh and delicious for as long as possible.
- Store cooled apples in an airtight container in the refrigerator for up to two days to maintain texture and flavor.
- Place a sheet of wax or parchment paper between layers if you’re stacking multiple apples to prevent sticking.
- Reheat in a 325°F (165°C) oven for about 10 minutes, or until warmed through, to restore that freshly baked taste.
- For a quick microwave option, heat individual apples on medium power for 30–60 seconds, checking to avoid overheating.
Frequently Asked Questions
Curious minds want to know—here are answers to the most common questions about these Cheesecake Stuffed Baked Apples:
- Q: How long does it take to prepare and bake this recipe?
A: It takes about 15 minutes to prepare the apples and cheesecake filling—this includes coring the apples, mixing ingredients, and preheating the oven—plus 25 to 30 minutes of baking time, for a total of roughly 40 to 45 minutes from start to finish.
- Q: How do I choose the best apples for this recipe?
A: Select firm, tart to mildly sweet varieties such as Granny Smith, Honeycrisp, or Pink Lady. These apples hold their shape during baking and provide a nice contrast to the rich cheesecake filling without turning mushy.
- Q: Can I prepare the cheesecake filling or apples in advance?
A: Yes. You can mix the cheesecake filling up to 24 hours ahead and refrigerate it in an airtight container. Core and hollow the apples the morning you plan to bake. Spoon in the chilled filling just before baking to maintain its texture and freshness.
- Q: What variations can I make to the filling for extra flavor or texture?
A: You can stir ¼ cup of chopped pecans or walnuts into the filling for a crunchy bite, fold in mini chocolate chips for sweetness, or swap brown sugar for maple syrup. For a citrus twist, increase lemon zest to 1½ teaspoons or add a pinch of orange zest.
- Q: How can I ensure the apples cook evenly and the filling sets properly?
A: Choose apples of similar size for uniform baking. Arrange them snugly in the baking dish to help retain steam. Bake at 350°F (175°C) for 25 to 30 minutes; the apples should be tender when pierced with a fork and the filling should no longer jiggle in the center.
- Q: How do I store and reheat any leftovers?
A: Cool stuffed apples to room temperature, then store in an airtight container in the refrigerator for up to two days. Reheat in a 325°F (165°C) oven for about 10 minutes or until warmed through. You can also microwave individual apples for 30 to 60 seconds if you’re short on time.
- Q: Can I make this recipe gluten-free or vegan?
A: To make it gluten-free, use certified gluten-free rolled oats. For a vegan version, substitute cream cheese with a dairy-free alternative, replace the egg with a flax or chia egg (1 tablespoon ground flaxseed or chia seeds mixed with 3 tablespoons water, set for 5 minutes), and use a plant-based butter substitute.
What Makes This Special
These Cheesecake Stuffed Baked Apples hit all the right notes: cozy, creamy, and oh-so-satisfying. The contrast of tender-baked fruit and tangy cheesecake with a crunchy oat topping is what makes this recipe such a standout fall treat. It’s easy enough for a beginner but impressive enough to serve at gatherings—you might just get labeled “that dessert genius.” Feel free to print this article and save it for your next baking session, and don’t hesitate to leave a comment or question if you give this recipe a whirl!
Print
Cheesecake Stuffed Baked Apples
- Prep Time: 20 mins
- Cook Time: 30 mins
- Total Time: 50 minutes
- Yield: 4 servings
- Category: Desserts
Description
Tender apple shells cradle a smooth, tangy cheesecake center, mingling warm cinnamon, buttery oats, and a hint of lemon zest in every bite.
Ingredients
- 4 medium apples
- 8 ounces cream cheese, softened
- 1/4 cup granulated sugar
- 1 large egg
- 1 teaspoon vanilla extract
- 1 teaspoon lemon zest
- 1/2 teaspoon ground cinnamon
- 2 tablespoons brown sugar
- 2 tablespoons rolled oats
- 1 tablespoon unsalted butter, melted
Instructions
- Preheat the oven to 350°F (175°C) and lightly grease a baking dish.
- Slice the top off each apple and use a corer or spoon to remove the core and seeds, creating a cavity.
- In a mixing bowl whisk together cream cheese, granulated sugar, egg, vanilla extract, lemon zest, and cinnamon until smooth.
- Stir in brown sugar, rolled oats, and melted butter to the cream cheese mixture.
- Spoon the cheesecake filling into the cavity of each apple, mounding slightly on top.
- Place the stuffed apples in the prepared baking dish and bake for 25-30 minutes until apples are tender and filling is set.
- Remove from the oven and allow the apples to cool slightly before serving.
Notes
- For extra crunch stir chopped pecans or walnuts into the filling.
- Leftover baked apples can be stored in an airtight container in the refrigerator for up to two days.
- Drizzle with caramel sauce or honey for added sweetness before serving.
- Use gluten-free oats to make this recipe suitable for gluten-free diets.