
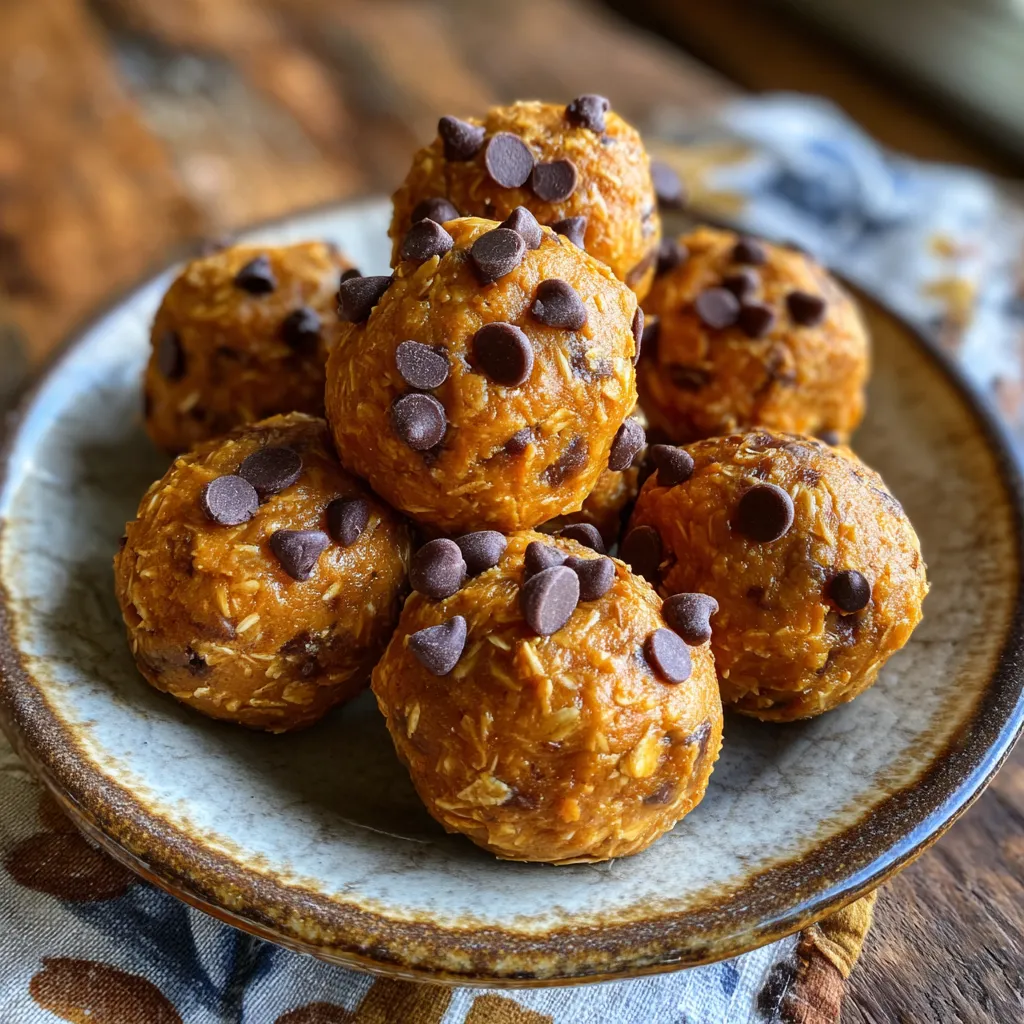
These No Bake Pumpkin Balls are your new go-to autumn snack—tiny pumpkin-spice bites studded with chocolate chips and loaded with silky puree, nutty peanut butter, and warming spices. No oven required here: just mix, chill, and roll for soft, chewy clusters that taste like fall in every bite. Whether you need a quick energy boost or a healthy dessert, these beginner-friendly treats deliver velvety texture and cozy pumpkin-pie vibes you’ll want on repeat.
Key Ingredients
Here’s what you’ll need to whip up these energy-packed treats:
- 1 cup pumpkin puree: Provides creamy moisture and that classic pumpkin flavor.
- 1/2 cup peanut butter: Adds rich, nutty creaminess and a protein boost.
- 1/4 cup maple syrup: Sweetens naturally while enhancing the fall spice blend.
- 1 teaspoon vanilla extract: Deepens the overall flavor with a hint of warmth.
- 1 teaspoon pumpkin pie spice: Brings the signature autumn blend of cinnamon, nutmeg, and cloves.
- 1/2 teaspoon ground cinnamon: Infuses extra warmth and cozy spice notes.
- 1/4 teaspoon salt: Balances sweetness and highlights all the pumpkin-spice nuances.
- 2 cups old fashioned rolled oats: Provides hearty chewiness and structure to hold the balls together.
- 1/2 cup mini chocolate chips: Delivers melty pockets of sweetness in every bite.
How To Make No Bake Pumpkin Balls
Creating these pumpkin balls is delightfully straightforward—no baking, no fuss. You’ll simply combine your wet ingredients until smooth, stir in spices, fold in oats, and finish with chocolate chips. Then scoop, roll, and chill. In just seven easy steps, you’ll transform pantry staples into a fall-flavored snack that’s perfect for lunchboxes, dessert plates, or an afternoon pick-me-up.
1. In a large bowl, stir together pumpkin puree, peanut butter, maple syrup, and vanilla extract until smooth and fully combined.
2. Add pumpkin pie spice, ground cinnamon, and salt to the bowl and mix well so the spices are evenly distributed.
3. Gradually fold in rolled oats, stirring just until the mixture is thick enough to hold its shape without crumbling.
4. Stir in mini chocolate chips until they are evenly distributed throughout the mixture.
5. Scoop tablespoonfuls of the mixture and roll into balls using lightly greased hands to prevent sticking.
6. Place the pumpkin balls on a baking sheet lined with parchment paper for easy cleanup and spacing.
7. Refrigerate for at least 30 minutes before serving to allow the flavors to meld and the texture to firm up.
Serving Suggestions
These pumpkin balls shine when you serve them just right. Whether you’re hosting a fall gathering or packing snacks for the week, these bites adapt to any occasion:
- Serve them chilled on a dessert platter alongside spiced lattes or apple cider for a cozy autumn spread.
- Pack a couple in a snack box with fresh fruit and nuts for a balanced, on-the-go treat.
- Roll the balls in toasted coconut flakes or finely chopped nuts for extra texture and visual appeal.
- Arrange them on a charcuterie board with cheese, crackers, and seasonal fruit for a fun party platter.
Tips For Perfect No Bake Pumpkin Balls
Getting these pumpkin-spice bites just right is easy when you know a few insider tweaks. Keep your hands lightly greased to roll smoothly, and don’t be afraid to taste and adjust as you go. Here are my favorite little hacks:
- For a nuttier flavor substitute almond butter for peanut butter.
- If the mixture is too sticky add more oats one tablespoon at a time.
- Store pumpkin balls in an airtight container in the refrigerator for up to one week.
- Freeze leftovers in a sealed bag for up to three months.
How To Store It
After rolling and chilling, you’ll want to store these balls so they stay fresh and flavorful. With just a bit of prep, you can enjoy them all week long or freeze for future cravings:
- Refrigerate in an airtight container for up to one week to keep them soft and chewy.
- Layer with parchment paper to prevent the balls from sticking together.
- Freeze in a sealed freezer bag or container for up to three months—grab a few and thaw in the fridge when hunger strikes.
- Thaw refrigerated or frozen balls in the fridge for about 30 minutes before serving to restore their creamy texture.
Frequently Asked Questions
Got questions? I’ve got answers!
- How long does it take to prepare and chill the No Bake Pumpkin Balls?
A: The mixing and rolling process takes about 10–15 minutes, and you’ll need to refrigerate the balls for at least 30 minutes before serving. Altogether, plan for approximately 45 minutes from start to finish.
- Can I swap out peanut butter for another nut butter?
A: Yes. You can substitute almond butter for peanut butter to achieve a nuttier flavor. Keep the same ½ cup measurement and ensure the almond butter is smooth for easy blending.
- What consistency should the mixture have before rolling?
A: The mixture should be thick enough to hold its shape when scooped and rolled. If it feels too wet or sticky, add old fashioned rolled oats one tablespoon at a time until the texture firms up.
- What kind of oats work best in this recipe?
A: Old fashioned rolled oats are recommended, as they provide the right texture and chewiness. Instant oats may make the mixture too soft, and steel-cut oats won’t soften enough without cooking.
- How should I store and freeze leftover pumpkin balls?
A: Store the pumpkin balls in an airtight container in the refrigerator for up to one week. To freeze, place them in a sealed freezer bag or container and keep them frozen for up to three months. Thaw in the fridge for 30 minutes before enjoying.
- Can I adjust the sweetness or spice level?
A: Yes. You can increase or decrease the ¼ cup of maple syrup to adjust sweetness. For a bolder spice profile, add more pumpkin pie spice or cinnamon by ¼ teaspoon increments until you reach your preferred taste.
- Do I need any special tools to make these pumpkin balls?
A: No special tools are required. A large mixing bowl, spoon or spatula for stirring, and a baking sheet lined with parchment paper are all you need. Lightly greasing your hands makes rolling easier.
What Makes This Special
These No Bake Pumpkin Balls work like magic because they combine pantry heroes—pumpkin puree, peanut butter, oats, and a dash of spice—into a chewy, chocolate-studded delight you don’t even have to bake. They’re beginner-friendly, allergy-flexible (swap nut butter easily), and perfect for whipping up on a whim. Go ahead and print this recipe to keep it handy, stash it in your autumn archives, and please drop a comment if you give it a whirl or need any tips. I love hearing how these little bites bring big smiles!
Print
No Bake Pumpkin Balls
- Prep Time: 10 mins
- Total Time: 10 minutes
- Yield: 10 servings
- Category: Desserts
Description
These no-bake pumpkin balls blend silky puree, nutty peanut butter, and warming spices into soft, chewy clusters dotted with melty chocolate chips. Chill briefly, then enjoy their velvety texture and sweet autumn flavors.
Ingredients
- 1 cup pumpkin puree
- 1/2 cup peanut butter
- 1/4 cup maple syrup
- 1 teaspoon vanilla extract
- 1 teaspoon pumpkin pie spice
- 1/2 teaspoon ground cinnamon
- 1/4 teaspoon salt
- 2 cups old fashioned rolled oats
- 1/2 cup mini chocolate chips
Instructions
- In a large bowl stir together pumpkin puree peanut butter maple syrup and vanilla extract until smooth.
- Add pumpkin pie spice ground cinnamon and salt to the bowl and mix well.
- Gradually fold in rolled oats until the mixture is thick enough to hold its shape.
- Stir in mini chocolate chips until evenly distributed.
- Scoop tablespoonfuls of the mixture and roll into balls using lightly greased hands.
- Place the pumpkin balls on a baking sheet lined with parchment paper.
- Refrigerate for at least 30 minutes before serving.
Notes
- For a nuttier flavor substitute almond butter for peanut butter.
- If the mixture is too sticky add more oats one tablespoon at a time.
- Store pumpkin balls in an airtight container in the refrigerator for up to one week.
- Freeze leftovers in a sealed bag for up to three months.