
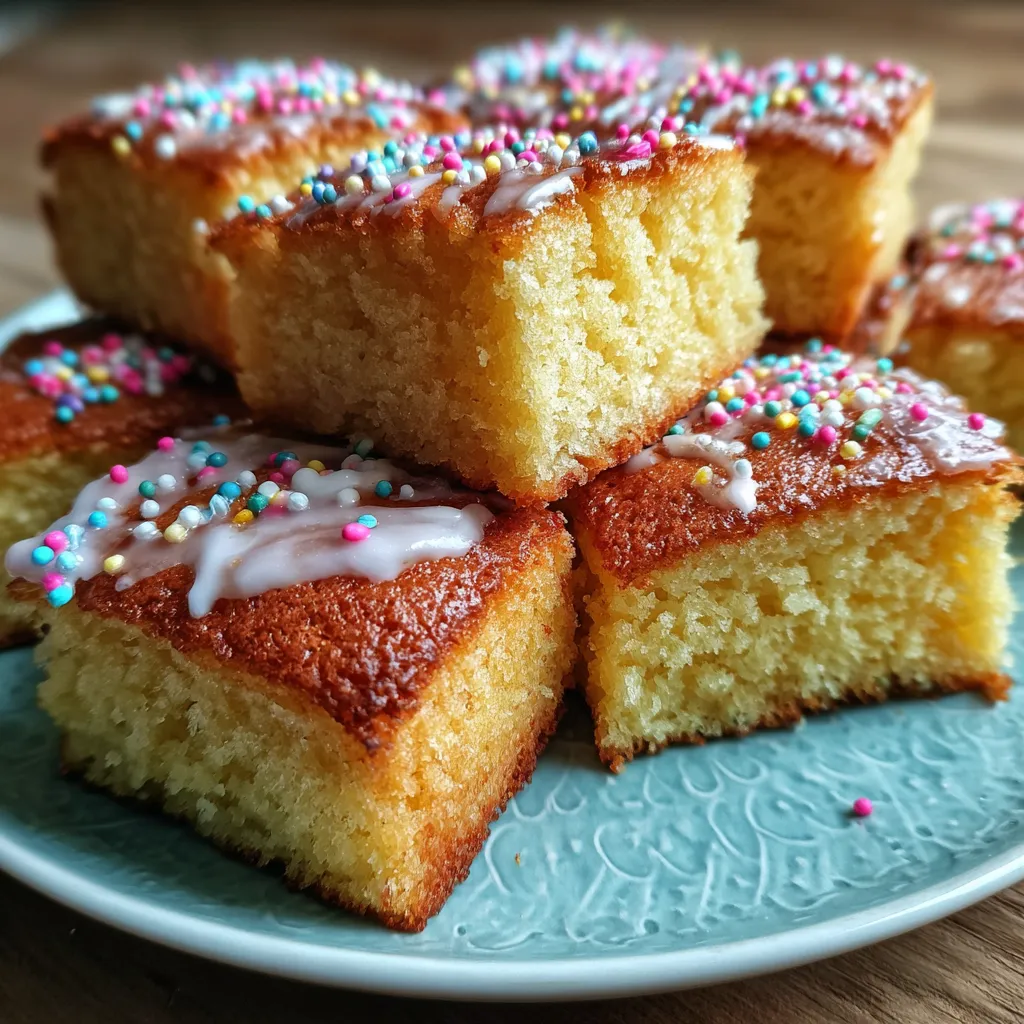
This Old School Sprinkle Sponge Tray Bake is a joyful nod to childhood treats, featuring a soft vanilla sponge baked to a golden perfection, slathered in silky chocolate icing, and crowned with a burst of crunchy rainbow sprinkles. Whether you’re looking for an easy dessert for weeknight baking or a nostalgic centerpiece for afternoon tea, this beginner-friendly tray bake combines simple ingredients into a fluffy, colorful delight. Come along as we explore every step to recreate this cheerful classic—your taste buds will thank you!
Key Ingredients
Here are the essential ingredients that come together to create our sprinkle-topped sponge tray bake:
- 200 grams unsalted butter: Provides rich flavor and helps create a tender, moist sponge.
- 200 grams caster sugar: Sweetens and helps achieve a light, fluffy texture when creamed with butter.
- 4 each eggs: Bind the ingredients and aerate the batter, resulting in a light sponge.
- 200 grams self-raising flour: Gives structure and rise to the sponge thanks to its built-in leavening agents.
- 1 teaspoon baking powder: Boosts the lift of the sponge, ensuring a fluffy, airy bake.
- 2 teaspoons vanilla extract: Adds warm, aromatic vanilla flavor that complements the chocolate icing.
- 2 tablespoons milk: Moistens the batter, helping to achieve a smooth consistency for the sponge.
- 100 grams icing sugar: Forms the sweet base of the chocolate icing with a silky finish.
- 2 tablespoons cocoa powder: Delivers rich chocolate flavor for the glossy icing layer.
- 2 tablespoons milk: Thins the icing to a pourable consistency for easy spreading.
- 50 grams rainbow sprinkles: Adds a playful, crunchy topping and nostalgic pop of color.
How To Make Old School Sprinkle Sponge Tray Bake
Baking this tray bake is a breeze: you’ll start by preheating the oven and creaming your butter and sugar, then gently folding in the eggs, flour, and a splash of milk to keep everything light and smooth. After a quick bake, you’ll cool the sponge, whip up a silky chocolate icing, and top it off with those cheerful rainbow sprinkles. Follow each step carefully and you’ll have a perfectly risen, gorgeously frosted, nostalgia-inducing treat in no time.
1. Preheat your oven to 180°C (350°F) and line a 20×30 cm baking tray with parchment paper, ensuring the paper comes a bit over the sides for easy removal.
2. In a large bowl cream the butter and sugar together until pale and fluffy, about 3–4 minutes with an electric mixer on medium speed.
3. Beat in the eggs one at a time, mixing well after each addition to maintain an even texture, then stir in the vanilla extract until fully combined.
4. Sift in the self-raising flour and baking powder, then fold gently with a spatula just until no streaks of flour remain—overmixing will deflate the batter.
5. Add the milk and mix briefly to achieve a smooth, pourable batter, scraping down the sides to incorporate every bit.
6. Spread the batter evenly into the prepared tray, tapping gently to level the surface, and bake for 20–25 minutes, or until golden and a skewer inserted into the centre comes out clean.
7. Allow the sponge to cool in the tray for 10 minutes before lifting it out by the parchment edges and transferring to a wire rack to cool completely.
8. To make the icing, sift the icing sugar and cocoa powder into a bowl and stir in the milk, adding it gradually until you reach a smooth, pourable consistency.
9. Pour the chocolate icing over the cooled sponge and spread evenly with a spatula, working quickly before the icing sets too much.
10. Immediately scatter the rainbow sprinkles over the icing and press them in gently with your fingertips so they adhere.
11. Once the icing is firm, cut the tray bake into squares and serve for a fun, colorful treat.
Serving Suggestions
After spending all that time baking and decorating, you’ll want to serve this tray bake in style! Whether it’s a laid-back family gathering or a special afternoon tea, these serving ideas will elevate your colorful creation to a showstopper dessert:
- Serve slices with a dollop of fresh whipped cream and an extra sprinkle of rainbow jimmies for a whimsical finish.
- Pair each square with a steaming mug of Earl Grey tea or coffee to balance the sweetness and complement the chocolate.
- Add a side of fresh raspberries or strawberries to introduce a bright, tangy contrast against the rich sponge.
- Wrap individual squares in parchment paper and tie with twine for a charming lunchbox treat or party favor.
Tips For Perfect Old School Sprinkle Sponge Tray Bake
Baking a flawless tray bake is all about prepping well and handling the batter gently. Follow these notes to ensure your sponge stays light, your icing glistens, and those sprinkles sit pretty:
- Ensure all ingredients are at room temperature before you begin.
- Do not overmix the batter to keep the sponge light and airy.
- Use parchment paper for easy removal of the tray bake and clean edges.
- Store leftovers in an airtight container for up to three days to maintain freshness.
How To Store It
Whether you’re saving leftovers or planning ahead, storing your sprinkle sponge tray bake properly will keep it tasting fresh and moist. Follow these storage techniques to preserve its flavor, texture, and that glossy icing:
- Room Temperature: Place cooled squares in an airtight container, layering them between sheets of parchment paper. They’ll stay fresh for up to three days.
- Refrigeration: If your kitchen is warm, seal the tray bake in a container and store in the fridge for up to five days—allow it to come back to room temperature before serving.
- Freezing: Wrap individual squares tightly in plastic wrap, then pack into a freezer-safe bag. Freeze for up to two months and thaw overnight in the fridge.
- Reheating: Warm slices in a low oven (150°C/300°F) for 5–7 minutes to revive that fresh-baked texture before serving.
Frequently Asked Questions
Here are some quick answers to common questions about making and enjoying this nostalgic tray bake:
- How long does it take to prepare and bake the Old School Sprinkle Sponge Tray Bake?
Preparation takes about 15 minutes, which includes creaming the butter and sugar, beating in the eggs, and folding in the dry ingredients. Baking time is 20–25 minutes, plus 10 minutes of cooling in the tray and additional cooling time for the icing to set—around 15 minutes. In total, you’ll need approximately 60 minutes from start to finish.
- Why is it important to use room-temperature ingredients?
Room-temperature butter, eggs, and milk blend more easily, ensuring a smooth, airy batter. Cold ingredients can cause the butter to sequester lumps and prevent proper aeration, leading to a denser sponge. Letting everything sit at room temperature for at least 30 minutes before you begin will give you the lightest texture.
- How can I tell when the sponge is fully baked?
The sponge is done when it turns a light golden brown and a skewer or toothpick inserted into the center comes out clean or with a few moist crumbs attached. If wet batter clings to the skewer, return the tray to the oven for an additional 2–3 minutes and test again.
- What’s the secret to achieving a smooth, pourable chocolate icing?
Sift the icing sugar and cocoa powder together to remove lumps, then gradually stir in the milk just until you reach a pourable consistency. If the icing is too thick, add a teaspoon more milk at a time. If it’s too thin, add a little more sifted icing sugar. Work quickly to spread the icing before it starts to set.
- How should I store the tray bake, and how long will it keep?
Once the icing is firm, cut the tray bake into squares and store them in an airtight container at room temperature. They will stay fresh for up to three days. If your kitchen is warm, store them in a cool spot to prevent the icing from softening.
- Can I use a different size tray, and how would that affect baking time?
You can use a similarly shallow tray, but if it’s smaller, your mixture will be thicker and require a few extra minutes in the oven—check at 20 minutes and then every 2–3 minutes until done. If your tray is larger, the sponge will be thinner and may bake in 15–18 minutes. Always do the skewer test to confirm doneness.
- What can I do if my sprinkles sink into the icing?
For best results, scatter the rainbow sprinkles immediately after pouring and spreading the icing, while it’s still wet. Press them in gently with your fingertips. If they still sink, slightly thicken the icing by adding more sifted icing sugar so it holds the sprinkles on the surface.
- Is it possible to make this recipe gluten-free or dairy-free?
To make a gluten-free version, substitute the self-raising flour with a 1-to-1 gluten-free flour blend and add ½ teaspoon xanthan gum if it’s not already included. For a dairy-free option, use a plant-based butter and non-dairy milk in both the sponge and the icing. Keep the proportions the same and follow the instructions as written.
What Makes This Special
This Old School Sprinkle Sponge Tray Bake works because it combines simple, everyday pantry staples into a nostalgic treat that’s both foolproof and endlessly fun. The tender vanilla sponge bakes up light and fluffy, the chocolate icing adds a glossy, melt-in-your-mouth finish, and those rainbow sprinkles bring a pop of color and crunch that never fails to delight. Print this article, save it for later, and let me know how it goes—drop a comment below if you’ve got questions or want to share your sprinkle-topped success!
Print
Old School Sprinkle Sponge Tray Bake
- Prep Time: 15 mins
- Cook Time: 25 mins
- Total Time: 40 minutes
- Yield: 12 servings
- Category: Desserts
Description
A soft, light vanilla sponge bakes up golden before getting drenched in silky chocolate icing and a burst of crunchy rainbow sprinkles—pure nostalgia in every bite.
Ingredients
- 200 grams unsalted butter
- 200 grams caster sugar
- 4 each eggs
- 200 grams self-raising flour
- 1 teaspoon baking powder
- 2 teaspoons vanilla extract
- 2 tablespoons milk
- 100 grams icing sugar
- 2 tablespoons cocoa powder
- 2 tablespoons milk
- 50 grams rainbow sprinkles
Instructions
- Preheat your oven to 180°C (350°F) and line a 20×30 cm baking tray with parchment paper.
- In a large bowl cream the butter and sugar together until pale and fluffy.
- Beat in the eggs one at a time, mixing well after each addition, then stir in the vanilla extract.
- Sift in the self-raising flour and baking powder and fold gently until just combined.
- Add the milk and mix briefly to achieve a smooth batter.
- Spread the batter evenly into the prepared tray and bake for 20–25 minutes, or until golden and a skewer inserted into the centre comes out clean.
- Allow the sponge to cool in the tray for 10 minutes before transferring to a wire rack to cool completely.
- To make the icing, sift the icing sugar and cocoa powder into a bowl and stir in the milk until a smooth, pourable consistency is reached.
- Pour the chocolate icing over the cooled sponge and spread it evenly with a spatula.
- Immediately scatter the rainbow sprinkles over the icing and press them in gently to set.
- Once the icing is firm, cut the tray bake into squares and serve.
Notes
- Ensure all ingredients are at room temperature before you begin.
- Do not overmix the batter to keep the sponge light.
- Use parchment paper for easy removal of the tray bake.
- Store leftovers in an airtight container for up to three days.